

OREO COOKIES COVERED WITH CHOCOLATE
These Holiday Oreo Cookies covered with chocolate are one of the easiest treats to make, with only 3 ingredients. They’re quick, easy for the kids to make, and they will definitely draw attention to your dessert table. All you will need is red Oreo creme cookies, melted chocolate, and holiday sprinkles.
 This post may contain affiliate links. Read my privacy policy.
So I’m a huge fan of Oreo cookies, but dip them in melted chocolate and you end up with a whole other level of deliciousness. I try to keep the cookies out of the house. If they’re around, I will eat them all. Heavenly!!! Not only will I eat them ALL, but my kids will too. They will sneak them, and before I know it the bag is empty.
We had so much fun making these Holiday Oreo Cookies. Usually the kids get so messy, but because we used the molds it wasn’t too bad at all. In fact the clean up was super easy.
-
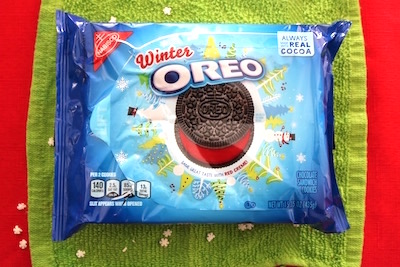
- winter Oreo cookies
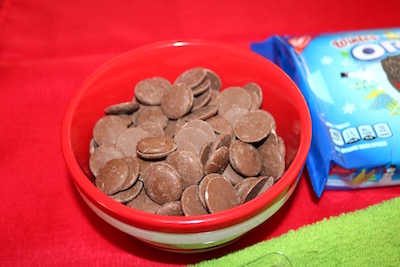
- milk chocolate wafers
- holiday sprinkles
CHOCOLATE COVERED OREO COOKIE WITH SPRINKLES
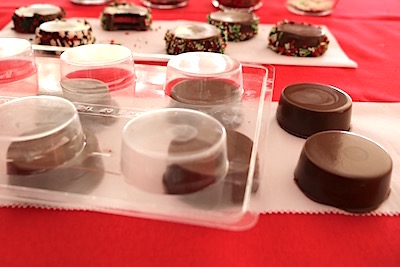
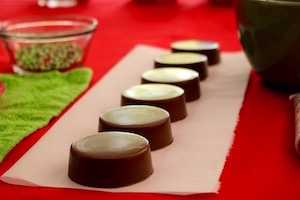
We made these and took them to a party as a gift, and within seconds they were the topic of conversation. We plated them beautifully, and added them to a display table of desserts. Can you believe these out ranked some of the other popular desserts on the table? And the biggest fans were….wait for it…..the kids. Lol, of course it was!!
Our first idea was to use some sprinkles on them, and write HO-HO-HO across 3 cookies. Instead we just rolled the sides of the cookies in the sprinkles.
I thought they looked really professional. The mold created a sparkly shine on the cookie, and the sprinkles gave them a pop of color for that holiday look. I’m happy we chose the sprinkles.
STEPS TO MAKE CHOCOLATE COVERED OREO COOKIES


HOW DO I MAKE OREO COOKIES COVERED WITH CHOCOLATE?
-
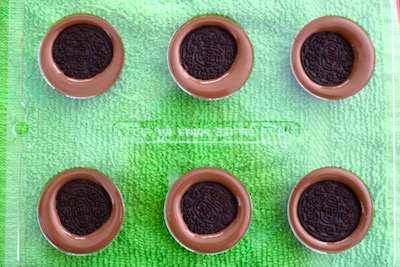
- Add a the melted chocolate about 1/4 way up, then add the Oreo. Center the cookie so it ends up in the middle of the chocolate. Add melted chocolate to the top of the cookie until it covers the Oreo.
- Put in the freezer for about 5 minutes, or until the chocolate is firm.
- Take them out, and just turn the mold over and they will pop right out.
- Next, you’ll add you favorite sprinkles or decorations. (see recipe below on adding the sprinkles)
- Try using a candy writer to write cute sayings. Have fun with them.
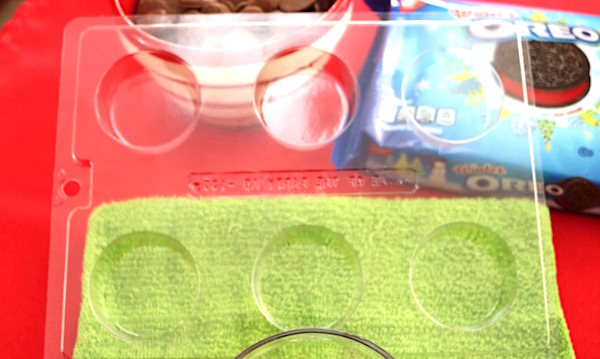
I first discovered this chocolate covered Oreo cookies mold from our local cake supply store. I was so excited to find this. It’s perfect to create designer Oreo cookies for any occasion.
Personally, I love the red Oreo creme. I thought these would make the best holiday treat, and gift for parties. I don’t usually buy Oreo cookies or have them in the house, but I made an exception for these because they were such a good find.
TIPS TO MAKE THE BEST HOLIDAY OREO COOKIES
-
- make sure the molds are clean, and free of dust
- wipe the inside of the molds, so you will get a nice shine on the chocolate
- choose an Oreo that has a holiday colored creme
- be sure the chocolate is not too thick after melting (see recipe)
- let chocolate cool completely before removing from the mold
- choose fun colors, and holiday themed sprinkles to show them off
HOW DO I STORE CHOCOLATE COVERED OREO COOKIES?
Store the chocolate covered Oreo cookies with sprinkles in an air tight container. If layering them, add a piece of parchment paper between the cookies, so they won’t stick together. If you’re in a warmer climate, or a warmer time of year be sure to keep them in the refrigerator to prevent melting. These will last about 2 weeks.
THINGS YOU MAY NEED FOR THIS RECIPE
WANT MORE HOLIDAY RECIPES FROM BUSY LITTLE CHEFS

Holiday Oreo Cookies
Ingredients
- winter Oreo cookies with red creme
- variety holiday sprinkles use whatever you like
- milk chocolate wafers or melt your favorite chocolate
Supplies
- 1 Oreo cookie mold
- 1 bowl microwave safe, or can melt on your stove
- 1 spoon
- wax paper, or parchment paper
Instructions
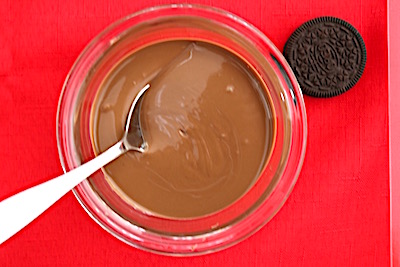
- Melt chocolate in a microwave safe bowl in 30 second bursts. Take out stir and melt for another 30 seconds. Repeat this until there's only a few lumps in the chocolate. Keep stirring until the lumps dissolve.
- Spoon the meted chocolate into the mold about 1/4 of the way up.
- Place the Oreo cookie into the center of the mold.
- Spoon the chocolate over the cookie and around the sides until the cookie is covered.
- Place into the refrigerator about 5 minutes. Check to make sure the chocolate has hardened. This step is pretty quick.
- When the chocolate has set, turn the mold over onto the wax paper and they should pop right out. Let them rest for a couple minutes so they're not too cool.
- Dip you spoon into the melted chocolate, and with the back side go around the side of the cookie so it's wet. (You will need to work fast, as this dries quickly especially if the cookie is still a little cold.)
- As you're holding the cookie grab some sprinkles, and sprinkle onto the wet chocolate. Set them down to dry.
You also might be interested in

Jump to Recipe Print Recipe Divinely delicous and as healthy[...]

This Smoothie is protein packed with raw healthy ingredients, and tastes delicious!

The Coconut Spinach Smoothie is one I could make for the kids on a regular basis.
ABOUT US

Hi, I’m Dyana! Mom of 2 boys, and creator of Busy Little Chefs. I have a passion for cooking, and teaching kids cooking skills. My guys love to help in the kitchen and come up with new and exciting recipes with a focus on healthy eating!
© 2024 · Busy Little Chefs Privacy Policy
Leave a Reply
We would love to hear from you!